
How to install PySpark in Anaconda & Jupyter notebook on Windows or Mac? In this article, I will explain the step-by-step installation of PySpark in Anaconda and running examples in Jupyter notebook. In case you are not aware Anaconda is the most used distribution platform for python & R programming languages in the data science & machine learning community as it simplifies the installation of packages like PySpark, pandas, NumPy, SciPy, and many more.
Steps to Install PySpark in Anaconda & Jupyter notebook
- Step 1. Download & Install Anaconda Distribution
- Step 2. Install Java
- Step 3. Install PySpark
- Step 4. Install FindSpark
- Step 5. Validate PySpark Installation from pyspark shell
- Step 6. PySpark in Jupyter notebook
- Step 7. Run PySpark from IDE
Related:
1. Download & Install Anaconda Distribution
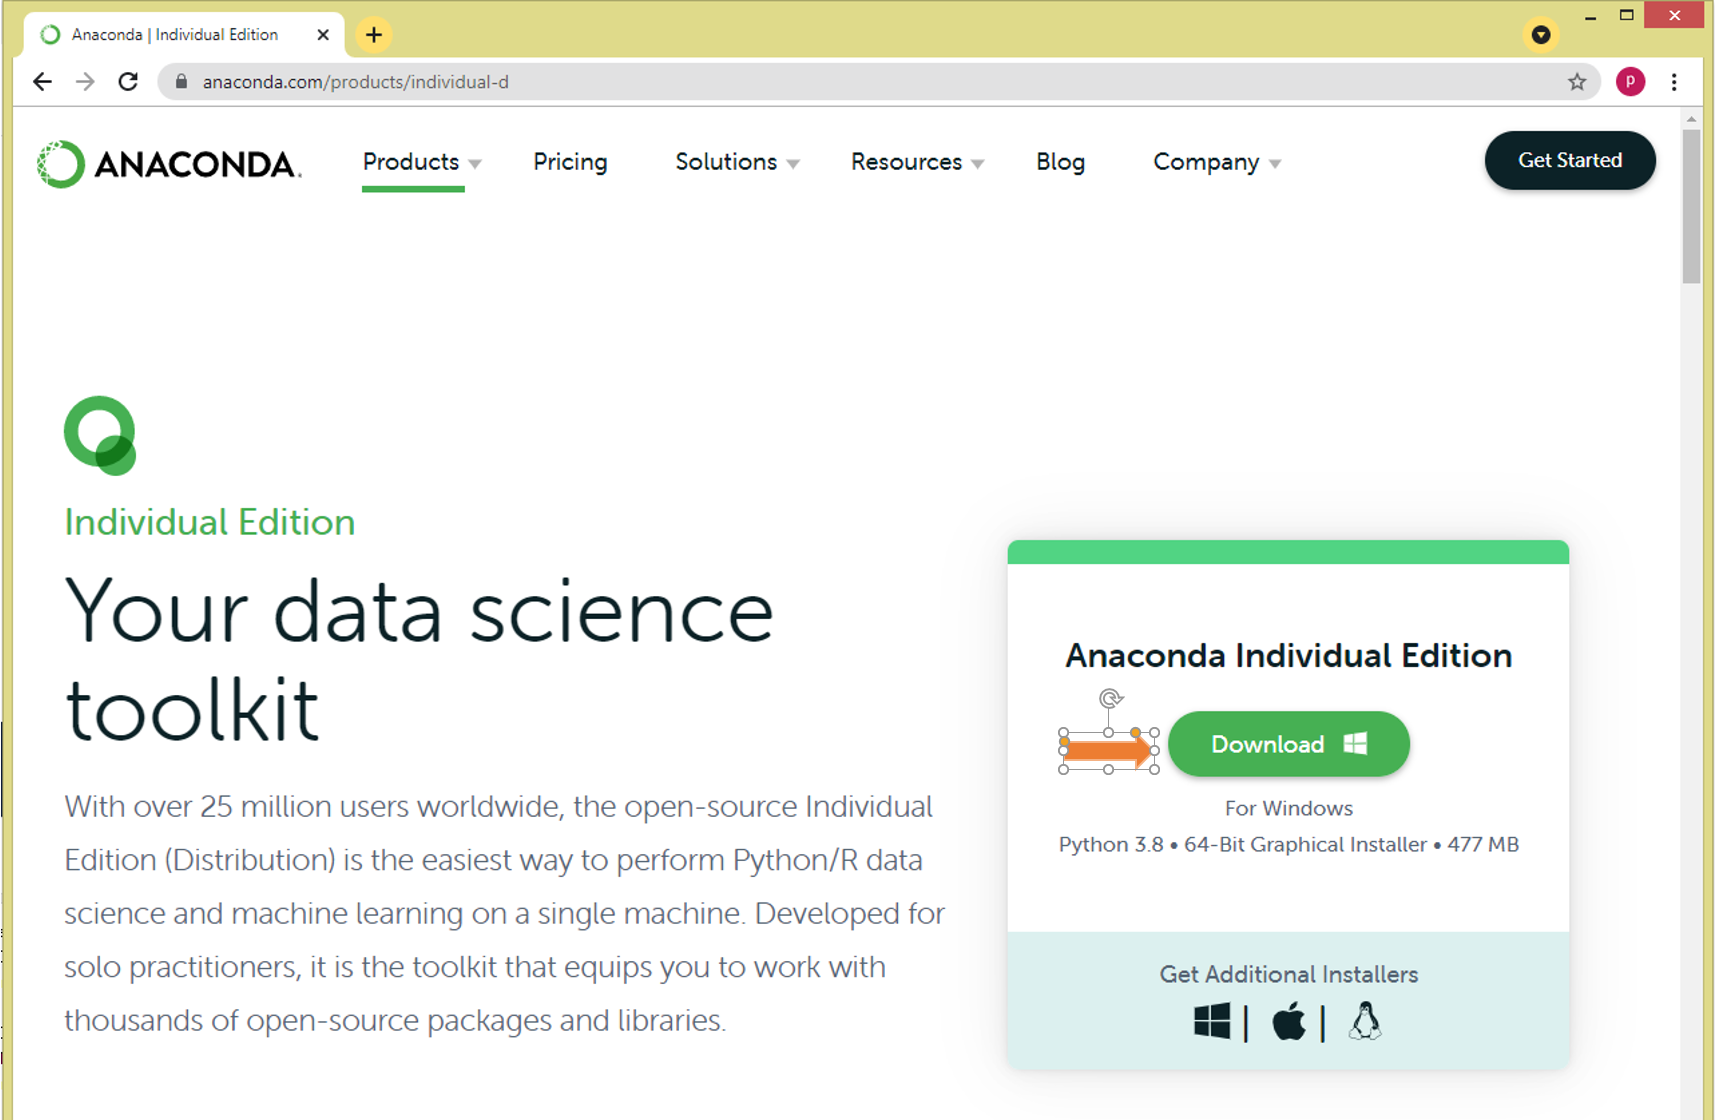
Go to https://anaconda.com/ and select Anaconda Individual Edition to download the Anaconda and install, for windows you download the .exe file and for Mac download the .pkg file.
After finishing the installation of Anaconda distribution now install Java and PySpark. Note that to run PySpark you would need Python and it’s get installed with Anaconda.
2. Install Java
PySpark uses Java underlying hence you need to have Java on your Windows or Mac. Since Java is a third party, you can install it using the Homebrew command brew. Since Oracle Java is not open source anymore, I am using the OpenJDK version 11. Open Terminal from Mac or command prompt from Windows and run the below command to install Java.
# Install OpenJDK 11
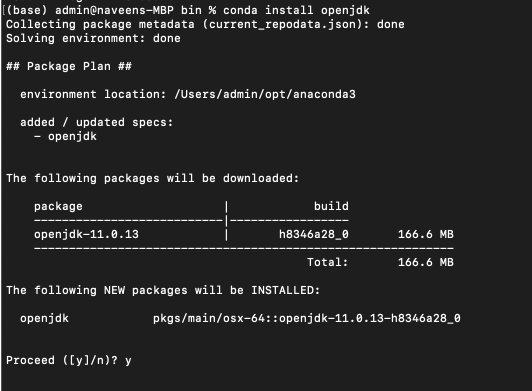
conda install openjdk
The following Java version will be downloaded and installed. Note that I am using Mac. Depending on OS and version you are using the installation directory would be different.
3. Install PySpark
To install PySpark on Anaconda I will use the conda command. conda is the package manager that the Anaconda distribution is built upon. It is a package manager that is both cross-platform and language agnostic.
# Install PySpark using Conda
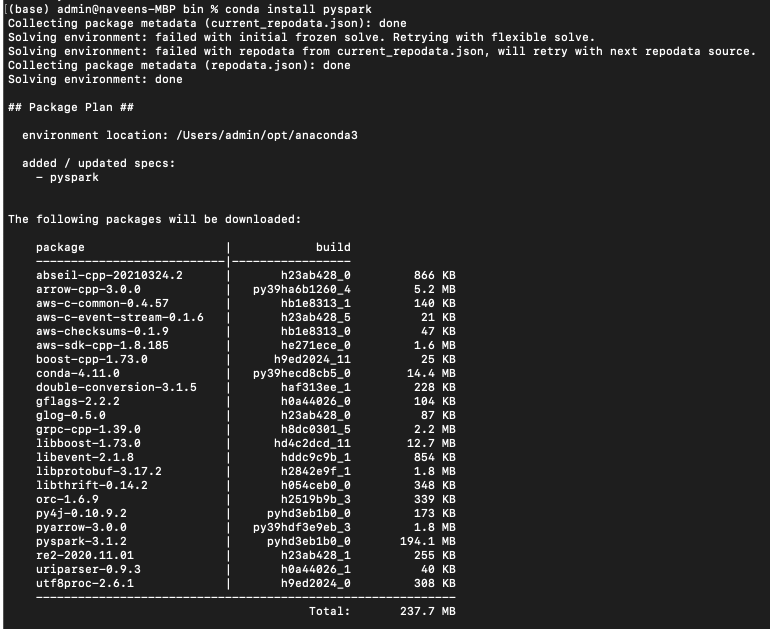
conda install pyspark
The following packages will be downloaded and installed on your anaconda environment. Note that based on your PySpark version you may see fewer or more packages.
4. Install FindSpark
In order to run PySpark in Jupyter notebook first, you need to find the PySpark Install, I will be using findspark package to do so. Since this is a third-party package we need to install it before using it.
conda install -c conda-forge findspark
5. Validate PySpark Installation
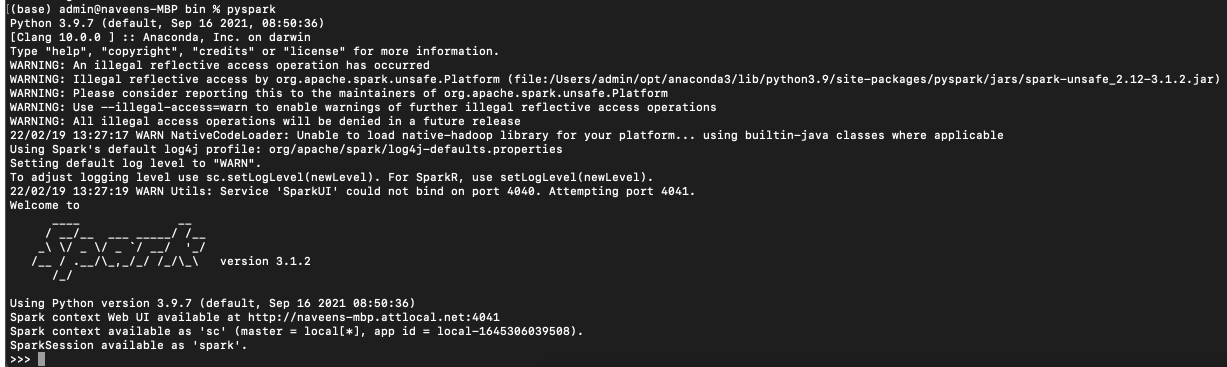
Now let’s validate the PySpark installation by running pyspark shell. This launches the PySpark shell where you can write PySpark programs interactively.
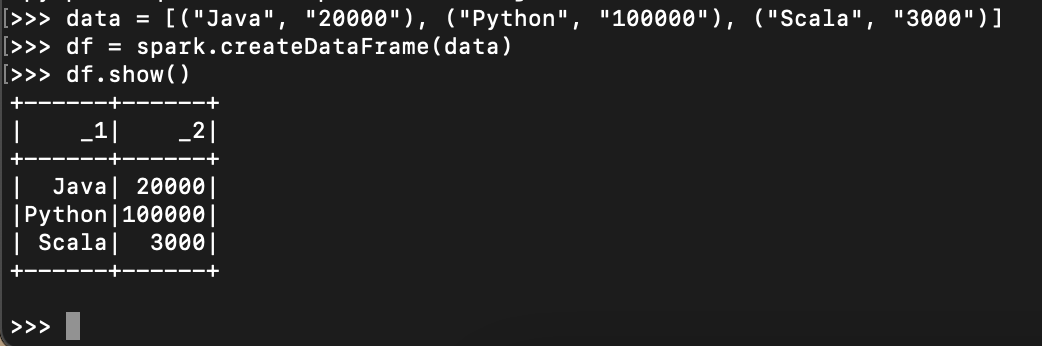
Let’s create a PySpark DataFrame with some sample data to validate the installation. Enter the following commands in the PySpark shell in the same order. Note that SparkSession 'spark' and SparkContext 'sc' is by default available in PySpark shell.
# Create DataFrame in PySpark Shell
data = [("Java", "20000"), ("Python", "100000"), ("Scala", "3000")]
df = spark.createDataFrame(data)
df.show()
Yields below output. For more examples on PySpark refer to PySpark Tutorial with Examples.
Now access http://localhost:4041/jobs/ from your favorite web browser to access Spark Web UI to monitor your jobs.
6. Install Jupyter notebook & run PySpark
With the last step, PySpark install is completed in Anaconda and validated the installation by launching PySpark shell and running the sample program now, let’s see how to run a similar PySpark example in Jupyter notebook.
Now open Anaconda Navigator – For windows use the start or by typing Anaconda in search. and for Mac, you can find it from Finder => Applications or from Launchpad. Anaconda Navigator is a UI application where you can control the Anaconda packages, environment e.t.c. If you don’t have Jupyter notebook installed on Anaconda, just install it by selecting Install option.
Post-install, Open Jupyter by selecting Launch button.

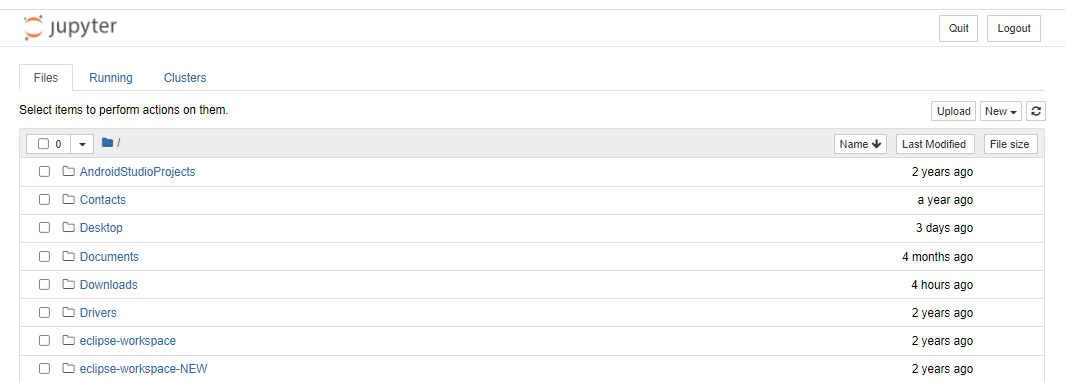
This opens up Jupyter notebook in the default browser.
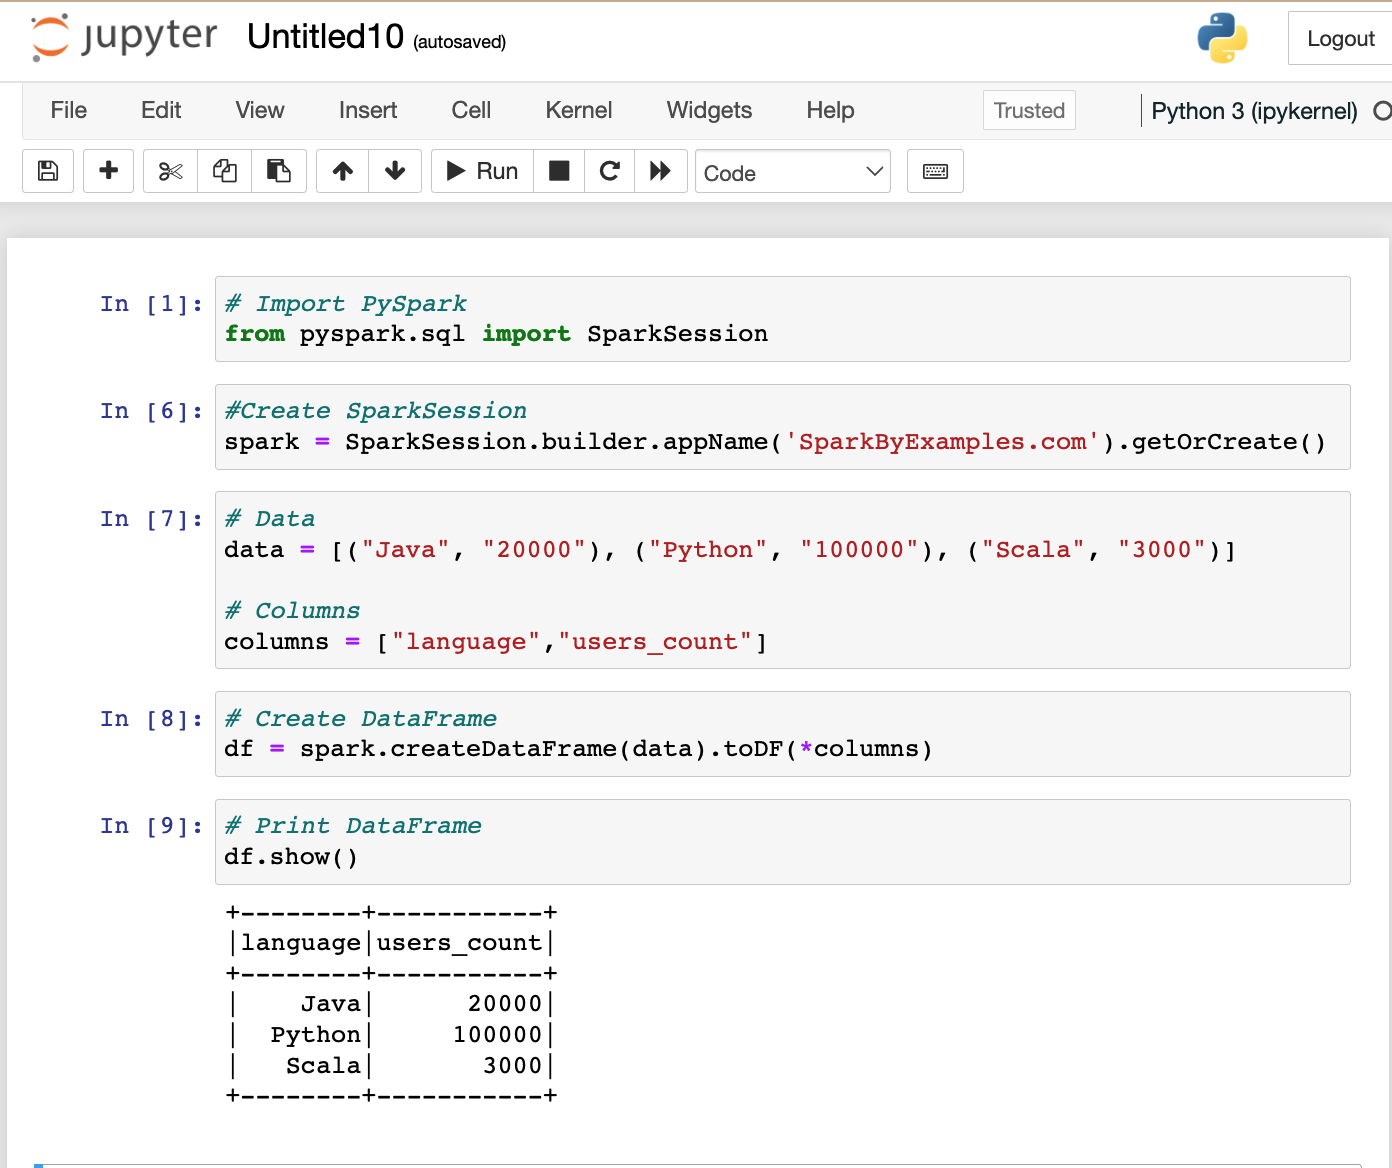
Now select New -> PythonX and enter the below lines and select Run. On Jupyter, each cell is a statement, so you can run each cell independently when there are no dependencies on previous cells.
If you get pyspark error in jupyter then then run the following commands in the notebook cell to find the PySpark .
import findspark
findspark.init()
findspark.find()
Run the below commands to make sure the PySpark is working in Jupyter. You might get a warning for second command “WARN util.NativeCodeLoader: Unable to load native-hadoop library for your platform” warning, ignore that for now.
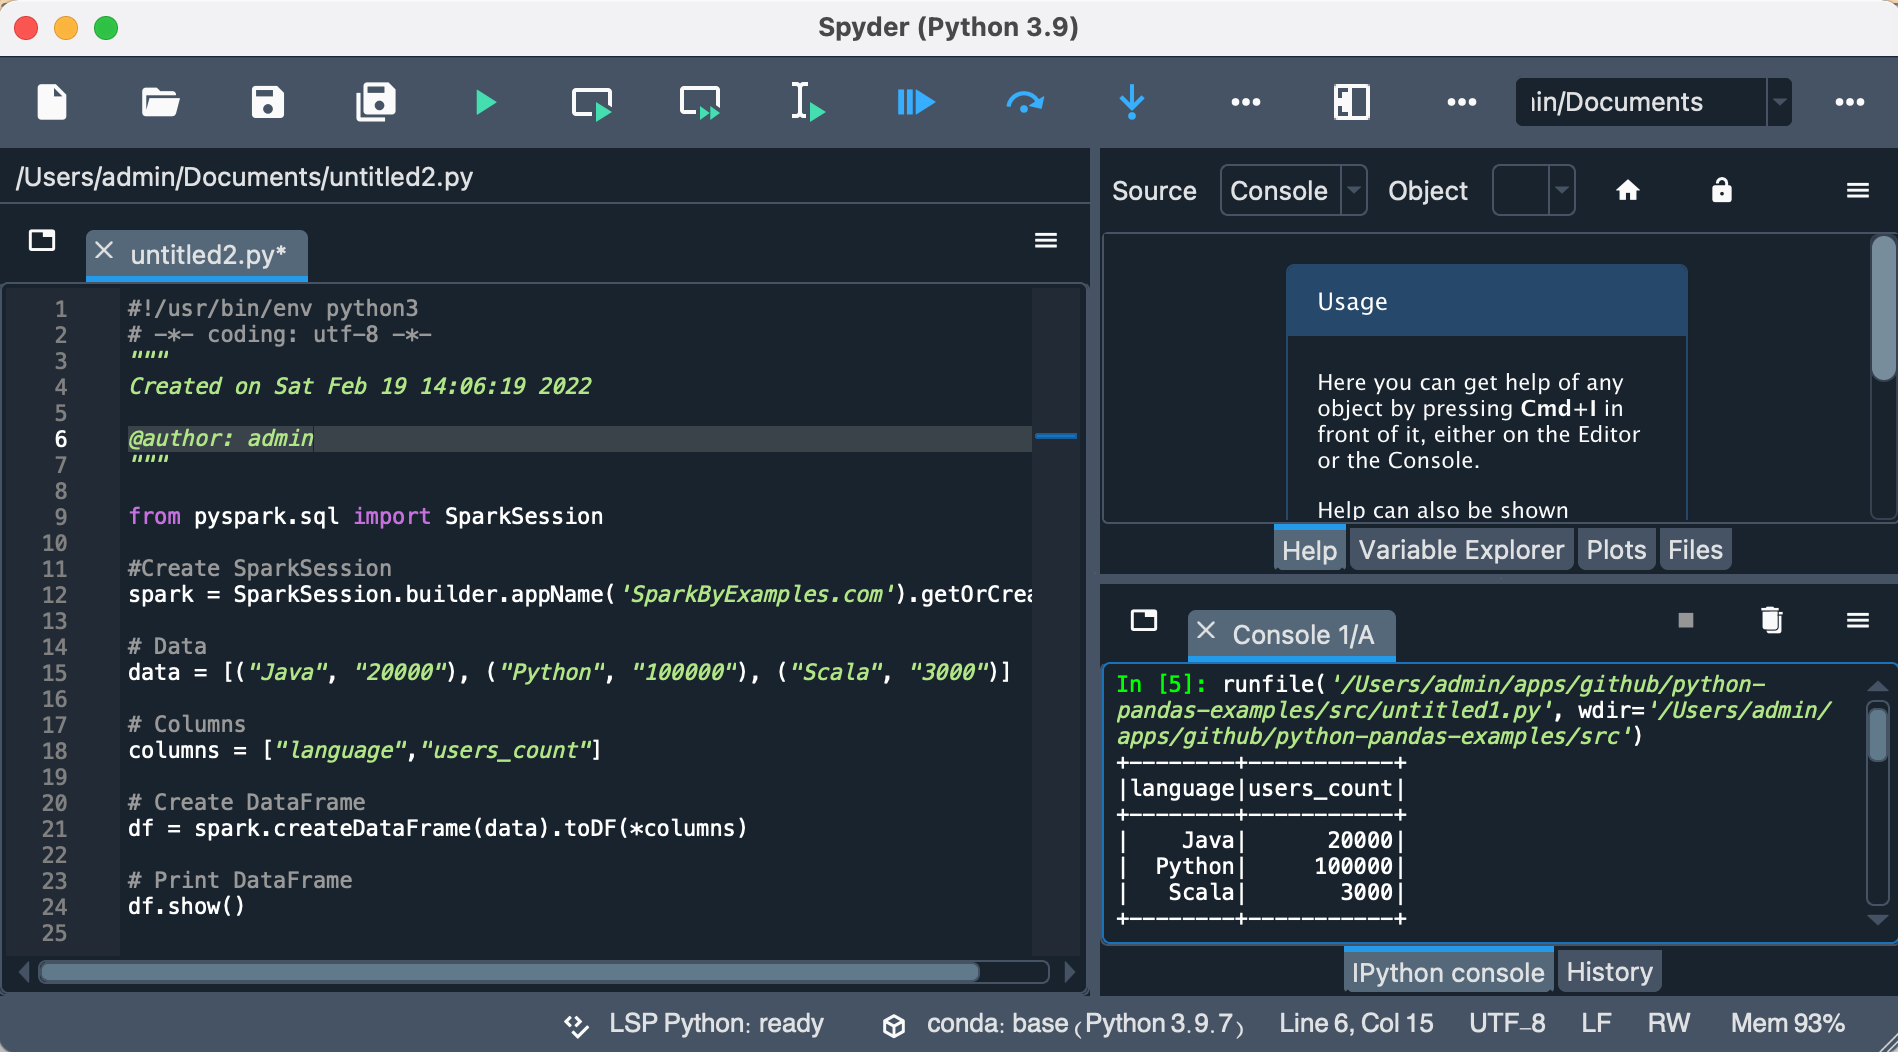
7. Run PySpark from Spyder IDE
Here I will use Spyder IDE.
If you don’t have Spyder on Anaconda, just install it by selecting Install option from navigator.
post install, write the below program and run it by pressing F5 or by selecting a run button from the menu.
# Import PySpark
from pyspark.sql import SparkSession

#Create SparkSession
spark = SparkSession.builder.appName('SparkByExamples.com').getOrCreate()

# Data
data = [("Java", "20000"), ("Python", "100000"), ("Scala", "3000")]

# Columns
columns = ["language","users_count"]

# Create DataFrame
df = spark.createDataFrame(data).toDF(*columns)

# Print DataFrame
df.show()
This completes PySpark install in Anaconda, validating PySpark, and running in Jupyter notebook & Spyder IDE. I have tried my best to layout step-by-step instructions, In case I miss any or you have any issues installing, please comment below. Your comments might help others.
Happy Learning !!
Related Articles
- Install PySpark in Jupyter on Mac using Homebrew
- How to Install PySpark on Mac (in 2022)
- How to Install PySpark on Windows
- Dynamic way of doing ETL through Pyspark
- How to Find PySpark Version?
- PySpark Shell Command Usage with Examples
- How to Run a PySpark Script from Python?
- Ways to Install Jupyter Notebook on Mac OS
- Update Jupyter Notebook or Jupyterlab
- Update pip to the latest version